For New Bedford, Massachusetts homeowners looking to install a fence, this guide offers essential DIY tips for a successful project. From planning your installation, choosing durable materials suited to the local climate, and digging post holes safely, to assembling your fence and adding functional gates and lighting, each step is detailed for a high-quality, long-lasting finish. Learn how to maintain your new fence and ensure it stands strong for years to come.
- Planning Your Fence Installation: Measuring and Permits
- Choosing the Right Fence Material for New Bedford Climate
- Digging Post Holes: Tools and Safety Tips for Homeowners
- Assembling Your Fence: Step-by-Step Guide to Construction
- Final Touches: Gates, Lighting, and Maintenance Considerations
Planning Your Fence Installation: Measuring and Permits
Before beginning your DIY fence installation, meticulous planning is key. Start by measuring the perimeter of the area where you intend to install the fence. Use a tape measure to ensure accurate dimensions, taking note of any curves or corners that may require adjustments in your fence design. This step is crucial for obtaining the right amount of materials and ensuring a properly fitted fence.
In New Bedford, Massachusetts, it’s essential to check with local authorities regarding permits before beginning construction. While specific regulations can vary, most cities require permits for fence installations, especially when the fence encumbers certain areas or reaches specific heights. Contacting your local building department in advance will save you time and potential fines, ensuring a smooth DIY fence installation process.
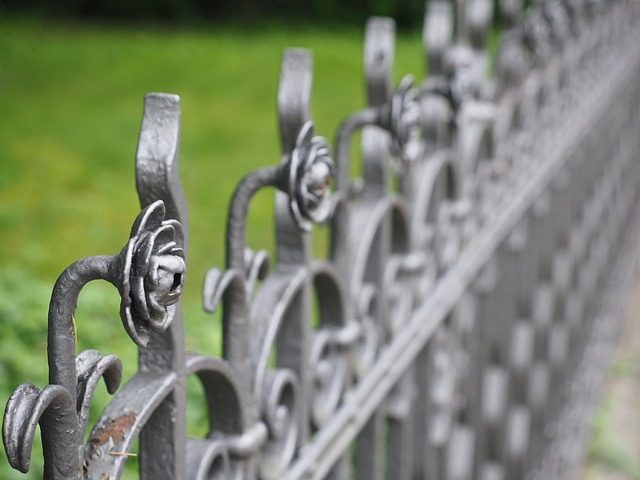
Choosing the Right Fence Material for New Bedford Climate
When it comes to choosing fence material in New Bedford, Massachusetts, climate plays a significant role. With cold winters and hot summers, homeowners need a durable option that can withstand both extreme temperatures and changing weather patterns. Wood is a popular choice but requires regular maintenance to prevent rot and damage from snow and ice. Vinyl fencing offers a low-maintenance alternative, with excellent resistance to rot, warping, and chipping. It’s also easy to clean and maintain.
For areas prone to strong winds and storms, a more robust material like chain link or wrought iron might be necessary. These options provide security and durability, but they may not be as aesthetically pleasing as wood or vinyl. Consider your home’s exterior style and the level of privacy you desire when making your selection. Ultimately, the right fence material should balance functionality, longevity, and visual appeal to enhance your New Bedford property.
Digging Post Holes: Tools and Safety Tips for Homeowners
Digging post holes is a crucial step in DIY fence installation, requiring careful planning and the right tools to ensure a sturdy and durable fence. New Bedford homeowners should invest in a good set of post-hole diggers designed for this purpose. These typically include a combination of a spade and a post-hole auger, which makes quick work of digging deep and wide holes for the fence posts.
Safety is paramount when operating heavy equipment. Wear appropriate protective gear, including gloves and eye protection. Ensure you have a clear path to dig in straight lines without obstacles. It’s also important to check local regulations regarding underground utility lines before beginning any excavation project. Marking the location of buried utilities with a call-before-you-dig service is a responsible step that can prevent damaging essential services.
Assembling Your Fence: Step-by-Step Guide to Construction
Assembling your fence is a crucial step after choosing the right material and design for your New Bedford, Massachusetts property. Start by collecting all the necessary tools, including a drill, level, measuring tape, post-hole digger, concrete mix, and rebar. Ensure your work area is clear and well-lit to facilitate precise measurements and installation.
Begin by marking the fence line with spray paint or stakes and string for guidance. Dig holes for the fence posts at predetermined intervals, ensuring they are deep enough (at least a third of the post’s height) to provide stability. Place the posts in the holes, using the level to check their alignment. Fill the holes partially with concrete, setting the posts firmly in place. Allow the concrete to cure completely before proceeding to attach the rails and panels according to your chosen design.
Final Touches: Gates, Lighting, and Maintenance Considerations
When completing your DIY fence installation project, remember to consider the final touches that will enhance both the functionality and aesthetic appeal of your new fence. Installing a gate is an essential addition, allowing for easy access to your property while maintaining control over who enters. Choose a gate style that complements your fence design and ensures it operates smoothly with proper hardware.
Regular lighting maintenance is another crucial aspect often overlooked. Strategically placing lights along your fence line improves visibility and security during evening hours. Consider energy-efficient LED options for long-lasting illumination. Lastly, prepare a basic maintenance plan to keep your fence in top condition. Regular cleaning, inspecting for damage, and applying protective coatings will ensure your investment lasts for years to come.